How to Make DIY Glass Jar Lanterns Step-by-Step Craft Guide
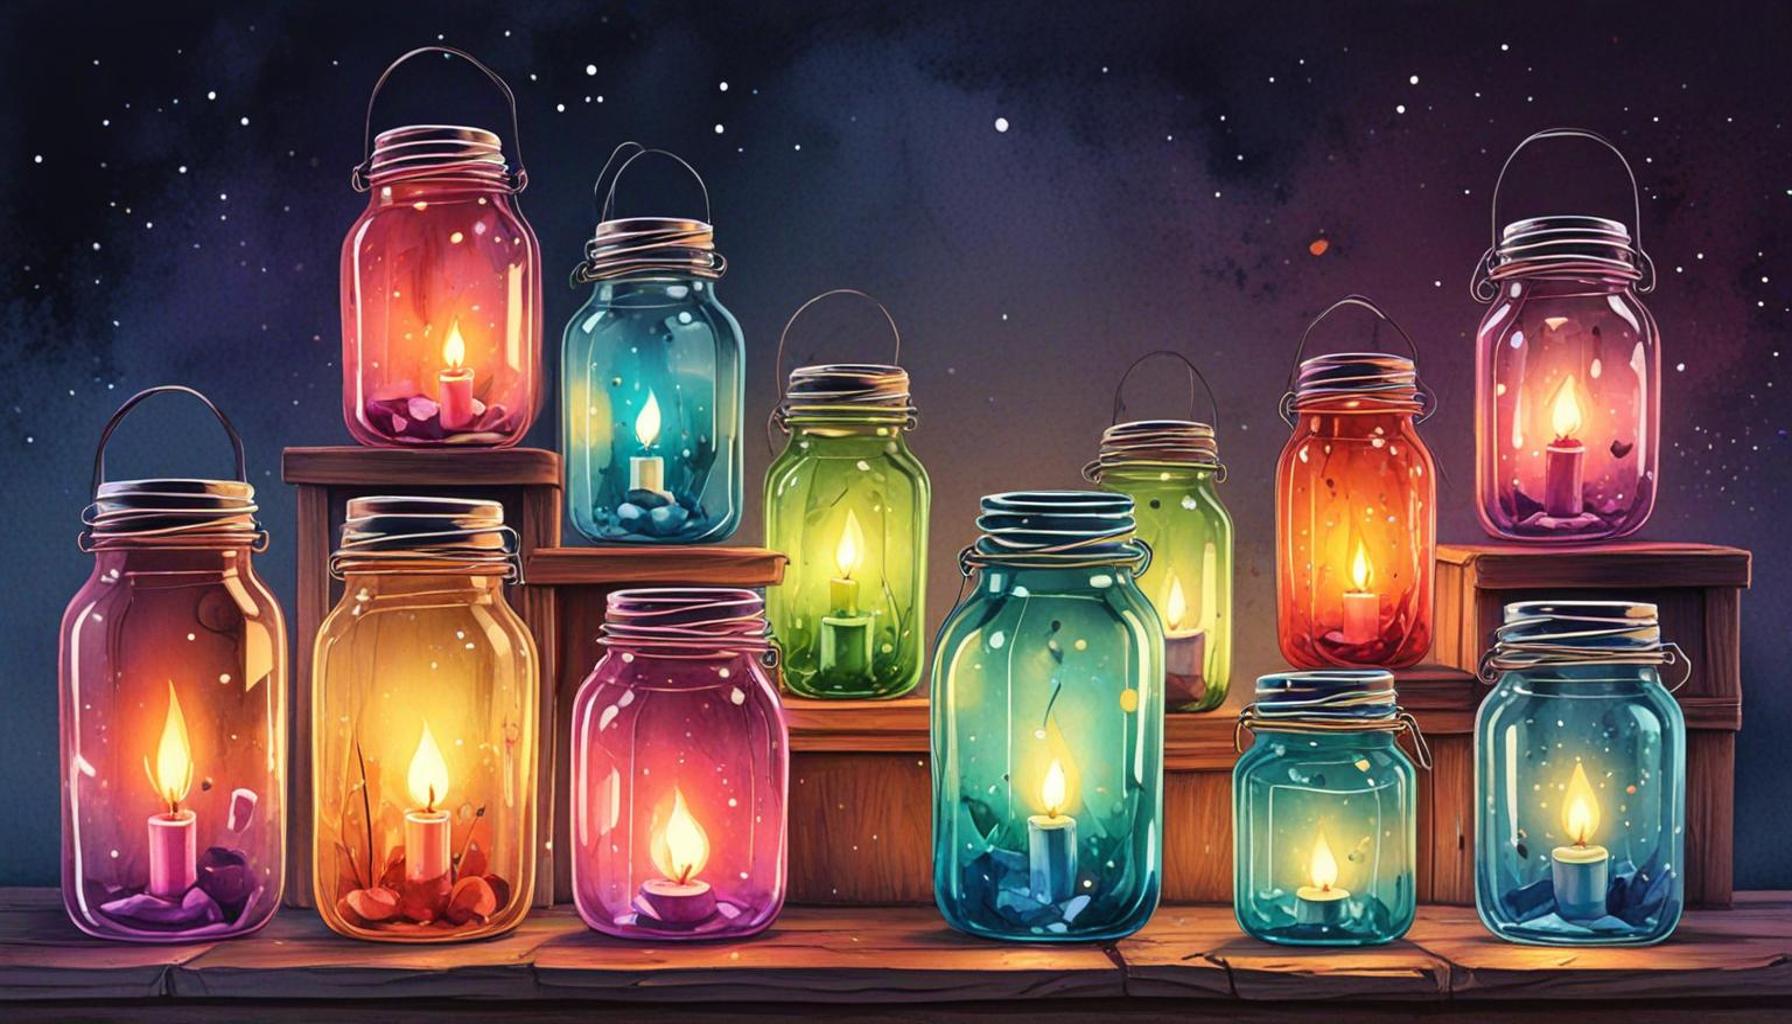
Illuminate Your Space with DIY Glass Jar Lanterns
Crafting your own DIY glass jar lanterns is an exciting way to bring warmth and charm to your home. These delightful creations not only add a personal touch to your decor but also serve as a fantastic project for all skill levels. With just a few materials, you can transform ordinary glass jars into stunning light sources that evoke feelings of nostalgia and comfort.
Why Choose Glass Jar Lanterns?
There are numerous reasons to dive into this captivating craft:
- Versatility: One of the most appealing aspects of glass jar lanterns is their adaptability. You can customize designs for any occasion—think festive themes for the holidays, romantic candlelight for intimate dinners, or whimsical decorations for birthday parties. With seasonal embellishments like autumn leaves or summer flowers, your lanterns can effortlessly change with the seasons.
- Affordability: Most materials required for these lanterns are inexpensive and often found at home. For instance, old mason jars, wine bottles, or even jam jars can easily be repurposed. You might need a few additional supplies like paint, twine, or battery-operated tea lights, but these items are generally budget-friendly and can be purchased at craft stores or online.
- Eco-Friendly: This project encourages sustainability by reusing glass jars that would otherwise be discarded. Not only does this reduce waste, but it also allows you to create something unique, reducing the need for mass-produced home decor.
In this step-by-step guide, you’ll discover:
- Essential materials needed for your lanterns, such as twine, paints, and suitable lighting options.
- Different techniques for decorating your jars, including decoupage, fabric wraps, or even simple color washing for a vintage effect.
- Safety tips for lighting them effectively, particularly when using candles versus battery-operated lights, to ensure a safe and enjoyable atmosphere.
Prepare to unleash your creativity! As you embark on this crafting journey, you’ll not only create beautiful lanterns but also enjoy a relaxing and fulfilling experience. Crafting is a delightful way to express your individuality while simultaneously honing your artistic skills. So, gather your supplies, and let’s get started on making unique glass jar lanterns that will illuminate your space with personal flair and warmth.
As you work on your lanterns, consider pairing them with other home decor elements. Grouping multiple lanterns together on a dining table or a porch can create a stunning focal point. If you have outdoor space, these lanterns can serve as enchanting garden lights, adding a magical touch to evening gatherings. Explore various color schemes and decorations to suit your style, and soon you’ll have a collection of enchanting lanterns that light up any space with a cozy glow.
CHECK OUT: Click here to explore more
Gather Your Materials for Your Glass Jar Lanterns
Before diving into the creative process of making your DIY glass jar lanterns, it’s essential to gather all the materials you will need. Having everything at hand will ensure a smooth crafting experience and allow you to focus on expressing your artistic vision. Here’s a comprehensive list of materials you might consider for your lantern-making project:
- Glass Jars: The star of the show! You can use mason jars, empty condiment jars, or even larger glass containers like cookie jars. Make sure they are clean and dry before starting.
- Twine or Ribbon: These materials are perfect for adding decorative touches around the neck of the jar. Twine gives a rustic vibe, while colorful ribbons can add a pop of fun.
- Paints: Acrylic paint is a popular choice for decorating glass jars. You can also use glass-specific paint or even spray paint for a smooth finish. Choose colors that match your intended aesthetic.
- Decoupage Materials: If you wish to create more intricate designs, consider using old newspapers, craft paper, or fabric. Decoupage glue will help adhere these materials to the jar.
- Lighting Options: Battery-operated tea lights are the safest option for illuminating your lanterns and are widely available at craft stores. If you opt for candles, ensure they are placed securely within the jar and monitored while lit.
- Paintbrushes and Sponges: These tools will help you apply paint and other materials effortlessly. A sponge can create interesting textures while painting.
- Scissors: You might need these to cut twine, ribbons, or paper.
- Wire (optional): For those wishing to hang their lanterns, consider using wire to create a handle. This adds a functional design element.
With your materials assembled, it’s time to unleash your creativity! The next step is to choose your decorative technique. The beauty of DIY glass jar lanterns lies in the endless possibilities. You can opt for a simple color wash for a washed-out vintage look, or perhaps you want to practice your decoupage skills with intricate designs that tell a story. Each approach has its benefits and can drastically change the look of your lanterns.
Choosing Your Decorating Technique
Let’s explore a few popular techniques that you can use to transform your jars into stunning works of art:
- Color Washing: This method involves diluting acrylic paint with water and applying it with a brush or sponge to create a dreamy, translucent effect on the glass.
- Decoupage: Using decoupage glue, you can adhere decorative paper or fabric onto the glass surface, layering to achieve depth. This technique allows for incredible customization—choose patterns that resonate with your personal style.
- Fabric Wrapping: For a cozy feel, wrap the jar with fabric and secure it with twine, creating a warm, homely look suitable for any season.
- Stencil Designs: If you are more inclined towards precision, using stencils can help you achieve clean, chic patterns. Simply use adhesive stencils with spray paint, or dab paint using a sponge.
Each technique provides unique outcomes, so experiment to find what you enjoy the most. Don’t hesitate to mix and match styles to create one-of-a-kind pieces. Your freshly crafted glass jar lanterns will not only rejuvenate your space but also serve as a proud testament to your creative skills.
Creating Your DIY Glass Jar Lantern: Step-by-Step Instructions
Now that you have gathered all materials and are ready to get started, here’s a detailed step-by-step guide to help you transform ordinary glass jars into stunning lanterns.
Step 1: Prepare Your Glass Jars
Begin by selecting your glass jars. Mason jars are a popular choice, but feel free to experiment with different shapes and sizes. Make sure they are clean and dry before you start working on them. Remove any labels and residue for a smooth finish.
Step 2: Apply Paint or Embellishments
You can choose to paint your jars using glass paint for a vibrant look. Alternatively, using twine, lace, or cloth can add a rustic touch. When decorating, you can apply mod podge before layering materials for a secure hold. It’s essential to let this layer dry thoroughly.
Step 3: Insert Your Lights
For lighting, you have several options including LED tealights, fairy lights, or even candles, if you’re accommodating for safety. If using candles, ensure they are well-centered and sized according to your jar.
Step 4: Create Handles (Optional)
If you wish to hang your lanterns, create handles using twine or wire. Wrap it around the neck of the jar, securing the ends in place. You can also add decorative beads for an extra touch.
Step 5: Final Touches
Lastly, give your lanterns a once-over, adding any final touches like ribbons or embellishments. Once you are satisfied with your design, you can place them in your desired spots, whether it’s for a cozy evening indoors or to brighten up your outdoor space.
Table of Advantages of DIY Glass Jar Lanterns
| Category 1 | Category 2 |
|---|---|
| Cost-effectiveness | DIY lanterns can be created using inexpensive materials you may already have at home, making it a budget-friendly craft. |
| Customization | These lanterns can be tailored to reflect personal style, allowing for endless creativity with colors, decorations, and themes. |
Creating DIY glass jar lanterns is not only a fun craft project but also an excellent way to personalize your living space. With these detailed steps, you’ll turn simple jars into brilliant sources of light that elevate any occasion.
SEE ALSO: Click here to read another article
Creating Your DIY Glass Jar Lanterns
Now that you’ve gathered all your materials and selected your favored decorating technique, it’s time to dive into the step-by-step process of crafting your stunning DIY glass jar lanterns. Follow these instructions to transform your ordinary glass jars into enchanting works of art:
Step 1: Prepare Your Work Area
To ensure a smooth crafting experience, start by preparing a designated workspace. Cover your table with newspaper or a plastic sheet to protect it from paint spills and glue. Ensure that the area is well-ventilated, especially if you are using spray paint or glue, which can emit strong fumes. Having your materials organized within reach will facilitate the crafting process and make cleanup easier.
Step 2: Clean and Dry Your Jars
Before applying any decorative elements, ensure your glass jars are thoroughly cleaned and dried. Remove all labels and residue, as impurities can prevent paint and adhesives from adhering properly. A mixture of warm soapy water can help eliminate stubborn adhesive residue. Additionally, you can use rubbing alcohol to give the glass a final wipe, preparing it for a perfect finish.
Step 3: Apply Your Chosen Decoration
With your jars ready, it’s time to unleash your creativity:
- For Color Washing: Mix your acrylic paint with water to create a wash. Use a paintbrush or sponge to apply this mixture to your jar’s exterior, ensuring even coverage. Allow the paint to dry between layers to attain the intensity of color you desire.
- For Decoupage: Cut your decorative paper or fabric into desired shapes or strips. Apply decoupage glue to the glass surface, place your cut pieces down, and then coat them with glue on top, ensuring smooth edges. Let this dry completely before adding additional layers.
- For Fabric Wrapping: Cut a strip of fabric that is long enough to wrap around your jar. Simply wrap your chosen fabric around the jar and secure it with twine or ribbon, creating an elegant look.
- For Stencil Designs: Place your stencils on the jar and use a sponge to dab paint over the stencil. Once lifted, you will unveil a crisp design. Allow the paint to dry thoroughly before touching or moving the jar.
Step 4: Add Lighting Elements
After your jars are beautifully decorated, it’s time to illuminate them. If you’re using battery-operated tea lights, simply place them inside the jar. These lights are safe and create a warm glow without the worry of fire hazards. If you decide to use candles, ensure they fit securely and avoid using them unattended. It’s also wise to place a base layer of sand at the bottom of the jar to stabilize any candles and catch wax drippings.
Step 5: Finishing Touches
To personalize your lanterns further, consider embellishing them with additional decorations. This could include adhering small decorative items such as beads, shells, or even faux flowers around the jar’s neck with hot glue. If you’ve opted for a hanging design, use a length of wire to fashion a handle. This not only makes it easy to hang your lanterns but also adds an attractive functional element.
Step 6: Enjoy Your Beautiful Lanterns
Your DIY glass jar lanterns are now ready to be showcased! Place them around your home, on your porch, or during gatherings. They’re perfect for parties, weddings, or simply to create a cozy ambiance in your space. The beauty of these lanterns is that they can be used throughout all seasons, bringing charm and personality wherever they are displayed.
Share your creations with family and friends, or even host a crafting party to inspire others to join in on this creative adventure. You may just find that making glass jar lanterns becomes a beloved seasonal tradition!
CHECK OUT: Click here to explore more
Conclusion
In summary, DIY glass jar lanterns offer a unique and personalized way to enhance your home’s aesthetics while tapping into your creative side. With just a few materials—such as glass jars, paints, twine, and LED lights—you can transform simple glass jars into gorgeous light sources that serve both functional and decorative purposes. By employing techniques like color washing, decoupage with patterned paper, or even fabric wrapping with seasonal prints, the potential to tailor these lanterns to your personal style is virtually limitless.
Moreover, these lanterns aren’t merely beautiful additions to your living space; they also make delightful gifts for housewarming parties or cherished mementos for friends and family. Consider creating themed lanterns for special occasions, such as Halloween with spooky silhouettes, or Christmas adorned with festive colors and designs. Furthermore, when placed strategically, they can serve as charming focal points for outdoor gatherings, illuminating patios and gardens, adding warmth to those summer nights, or enhancing the cozy ambiance during chilly fall evenings.
The process of crafting your lanterns can also be an enjoyable activity for people of all ages, making it an excellent opportunity for family bonding or a fun crafting party with friends. Imagine the laughter and creativity that would fill the room as everyone shares their unique ideas and techniques, leading to a delightful array of lanterns that reflect each person’s individual flair.
As you light up your home with your stunning creations, consider sharing your designs online through platforms like Instagram or Pinterest, or even showcasing them at local craft fairs. This not only inspires others but also fosters a sense of community around this creative endeavor. The art of making glass jar lanterns embodies the spirit of innovation and self-expression, emphasizing the importance of the journey of creation as much as the finished product. Dive in, experiment with different techniques, and let your creativity shine as brightly as your beautiful lanterns. Happy crafting!
Related posts:
Create DIY Sculptures Master Homemade Modeling Clay Techniques
Master Handmade Bookbinding Explore the Hobby Step-by-Step Guide
Create Your Own Handmade Illustrated Book A Step-by-Step Guide
How to Decorate Cardboard Boxes with Mixed Media Techniques
Creative Stone Painting Techniques for Unique Home Décor
Handcrafted Puppetry Essential Tips for Beginners Starting Out

Linda Carter is a writer and creative hobbies expert specializing in crafting, DIY projects, and artistic exploration. With extensive experience helping individuals discover their creative potential and bring their ideas to life, Linda shares her knowledge on our platform. Her goal is to empower readers with practical tips, inspiring ideas, and step-by-step strategies for success in the world of creative hobbies.