How to Create Colorful Mosaics Using Recycled Ceramics
Unleash Your Creativity with Recycled Ceramics
Creating art not only beautifies spaces but also promotes sustainability. **Colorful mosaics** made from recycled ceramics provide an excellent opportunity to merge creativity with eco-consciousness. By harnessing your imagination, you can transform discarded materials into stunning works of art that speak to both personal expression and environmental stewardship.
- Eco-Friendly Art: Using recycled ceramics not only reduces waste but also significantly lowers your carbon footprint. Each piece of ceramic that finds new life means less material in landfills, helping to combat pollution. This practice aligns with the broader trend of upcycling, where discarded products are given a new purpose. For instance, a broken plate might become a dazzling centerpiece for your garden or a quirky kitchen backsplash.
- Affordable Materials: The hunt for materials can be part of the excitement! You can often find broken tiles, chipped dishes, and old pottery at thrift stores, yard sales, or even while cleaning out your cupboards. This DIY art form allows for creativity without a hefty price tag; you can create aesthetically pleasing projects without emptying your wallet. Consider visiting your local Habitat for Humanity ReStores, where you can often find a treasure trove of building materials at discounted prices.
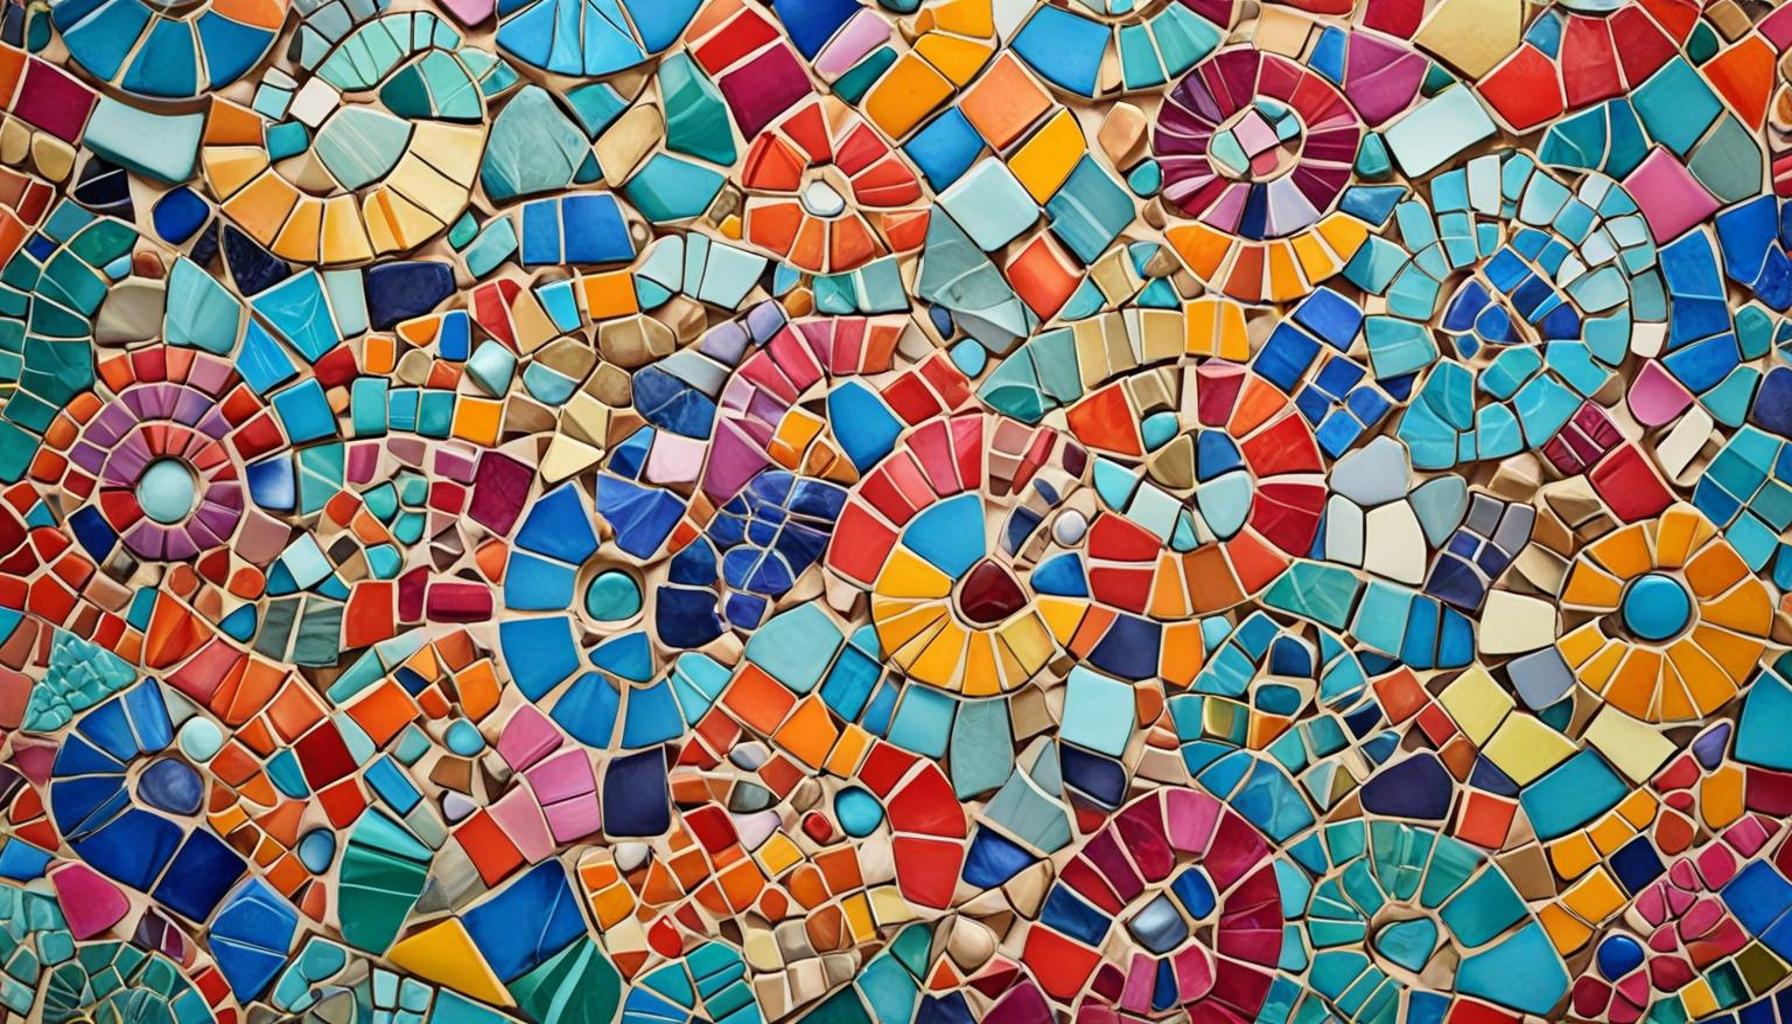
- Endless Design Options: The variety of colors and patterns available from ceramic pieces expands the creative possibilities exponentially. From vibrant blues and greens to earthy browns and reds, the combinations are limitless. You can craft anything from simple geometric shapes to intricate, detailed images that tell a story. For inspiration, check out social media platforms like Pinterest or Instagram, where artists share their dazzling mosaic designs and techniques.
Whether you are a seasoned artist or a curious beginner, the mosaic-making process will undoubtedly ignite your imagination. Start by gathering your materials, choosing your color palette, and sketching out a rough design. Consider using cardboard as a base; this sturdy option can handle the weight of your ceramics and secures them while you work. Each step, from arranging your pieces to applying adhesive and grouting, offers a chance for artistic expression and innovation.
As you meticulously place each ceramic tile, don’t shy away from experimenting with shapes and layouts. Abstract designs can be just as compelling as representational art. Additionally, using grout not only adheres your mosaics but also adds a new texture to your piece. The final result may become a conversation starter in your home or a cherished gift for someone special. Embrace your inner artist and get ready for an inspiring journey filled with vibrant colors, intricate patterns, and the satisfaction of creating something meaningful from what would have been discarded.
In conclusion, exploring the world of recycled ceramics is not just an art project; it’s a celebration of creativity, sustainability, and personal expression. So gather your materials and embark on this delightful endeavor that’s sure to beautify your environment while reflecting your unique artistic vision.
SEE ALSO: Click here to read another article
Gathering Your Materials: The First Step to Colorful Creation
Creating colorful mosaics using recycled ceramics begins with the foundation of your artwork: the materials. Finding unique and interesting pieces can be the most enjoyable part of the process. Look around your home or local community for ceramics that are no longer in use. Items such as broken tiles, chipped plates, or even ceramic figurines can provide the vibrant colors and patterns needed for your project. Thrift stores, yard sales, and flea markets are treasure troves for discovering these materials. Additionally, keep an eye out for discarded ceramics during home renovations or community clean-up events.
When selecting materials for your mosaic, consider the following factors to ensure you have a suitable collection to work with:
- Variety of Colors: Opt for a diverse range of hues to create contrast and eye-catching designs. Bright reds, deep blues, and calming greens can all come together to form stunning pieces.
- Texture Adaptability: Different ceramic items will have unique textures that can add depth to your mosaic. Mixing smooth plates with rugged tiles can enhance visual interest.
- Size Consideration: Include both large and small pieces in your materials. This allows you to play with proportion and layering in your design.
- Patterns and Designs: Choose ceramics with distinct patterns or motifs. These can serve as focal points or help inspire the overall theme of your mosaic.
Once you have gathered a captivating array of ceramic materials, it’s time to determine your workspace. Create a clean, flat surface where you can comfortably assemble your mosaic. This could be a sturdy table covered with a plastic cloth or an old board that can withstand glue and grout. Having good lighting is also crucial, as it helps you see details and potential color combinations more clearly.
Before diving into the art of mosaic creation, take a moment to sketch your design. Even a quick outline can guide you through the process and give you a clearer vision of the final product. You might want to layout your materials on the workspace without gluing them down first. Experiment with different arrangements until you find one that resonates with you. This step is instrumental in honing your unique artistic style and emphasizes the beauty of the creative journey.
In the next section, we’ll discuss the techniques of cutting ceramics and the types of adhesive that work best for securing your mosaic pieces, setting the stage for a perfect masterpiece that is both beautiful and sustainable.
Exploring Techniques for Colorful Mosaic Creations
Creating stunning mosaics from recycled ceramics is not only an environmentally friendly craft but also a rewarding artistic endeavor. One of the essential techniques to master is the cutting of ceramics into various shapes. Use a tile cutter or a hammer for breaking the ceramics into smaller pieces. Ensure that you wear safety goggles and gloves to protect yourself during the process.To achieve vivid designs, consider arranging your pieces on a flat surface before adhering them down. This dry-fitting stage allows you to experiment with color combinations and patterns. You might find inspiration in nature, where vibrant colors coexist harmoniously. Incorporating different shades of tiles will enable you to create depth in your mosaic, evoking different sentiments and aesthetics.
Adhesives and Grouting for Durability
Choosing the right adhesive is crucial for your mosaic’s longevity. A strong adhesive, like thin-set mortar or mosaic glue, will secure your ceramic pieces effectively. Once your design is set, allow it to dry completely before applying grout. This step will fill in the gaps between pieces, giving your mosaic a polished look. Opt for colored grout that complements your tiles, enhancing the overall beauty of your design.As you work, remember to embrace your creativity. Mosaics aren’t just for surfaces; they can become stunning wall art or even garden decorations. Each piece you create tells a story of sustainability, creativity, and beauty.
| Technique | Description |
|---|---|
| Cutting Techniques | Utilizing tile cutters and hammers for precise shapes. |
| Dry-Fitting | Experimenting with tile arrangement before adhesion. |
| Grouting | Filling gaps to enhance durability and aesthetic appeal. |
Emphasizing the importance of creativity in your mosaic projects can lead to innovative designs. With every step, you’re molding not just a piece of art but a narrative woven from recycled materials. Continue exploring and experimenting as you refine your skills in this engaging craft.
CHECK OUT: Click here to explore more
Cutting Ceramics and Choosing the Right Adhesives
With your colorful collection of recycled ceramics spread out before you, the next step in creating a stunning mosaic is mastering the art of cutting ceramics. This may seem daunting at first, but with the right tools and techniques, you’ll be able to transform larger pieces into the perfect smaller shapes needed for your design. To begin with, it’s essential to wear protective eyewear and work gloves, as ceramic shards can be sharp and cause injury.
For cutting, consider using a tile cutter or a glass cutter, which are both effective tools for achieving clean cuts. A tile cutter is particularly useful for thicker ceramics and can produce precise straight cuts. If your design requires more intricate shapes, a handheld glass cutter can help you make curved lines or detailed designs. For those more interested in geometric patterns, a simple hammer can break larger ceramic pieces into smaller chips; just be sure to wrap them in a cloth before striking to contain any flying shards.
Once you’ve shaped your ceramic pieces, the next critical decision is selecting the right adhesive. Using a quality adhesive ensures your mosaic remains intact over time. There are various types available, but two of the most recommended for ceramic materials are thin-set mortar and craft glue designed for ceramics. Thin-set mortar is ideal for larger mosaics or outdoor projects as it provides a strong bond and weather resistance. In contrast, craft glue is more user-friendly and suitable for smaller projects or indoor uses.
Before applying the adhesive, lay out your ceramic pieces once more to confirm the arrangement works well. This planning stage can save you time and ensure satisfaction with your final design. After you’re satisfied, apply the adhesive generously but ensure it doesn’t ooze out between the pieces when they are pressed down. Allow the adhesive to cure for the recommended time, which varies depending on the type used—typically a minimum of 24 hours for thin-set mortar.
Once your pieces are securely bonded, it’s time to prepare for the grouting phase, another vital step in achieving the professional look of a mosaic. Selecting the correct grout can further enhance the final appearance of your project and help fill the gaps between your ceramic pieces. You can choose between sanded and unsanded grout, with sanded grout being preferred for wider gaps. Consider using colored grout to add an additional layer of color to your mosaic or contrast with the tiles for visual interest. This can change the overall aesthetic and add depth to your creation.
Mix the grout according to the manufacturer’s instructions and apply it using a rubber float to push it into the gaps effectively. Clean off any excess grout on the surface of your ceramic pieces, as it can be challenging to remove once it hardens. After allowing the grout to set, follow up with a damp sponge to wipe away any remaining residue for a polished appearance.
Armed with the right cutting techniques and adhesives, you now have the foundational skills to bring your colorful recycled ceramic mosaics to life. With practice and creativity, your personalized creations can serve as both a testament to sustainability and a captivating addition to your home or garden.
SEE ALSO: Click here to read another article
Conclusion: Unleashing Creativity with Recycled Ceramics
Creating colorful mosaics using recycled ceramics is not only an environmentally friendly practice but also an opportunity to showcase your artistic flair. By following the essential steps of cutting ceramics and selecting the appropriate adhesives, you’ll find that the process is both rewarding and enjoyable. The ability to transform discarded materials into beautiful art pieces can inspire a deeper appreciation for sustainability and creativity in home decor.
As you dive into the world of mosaic-making, keep in mind the importance of planning and experimentation. Each piece of ceramic carries its own unique character, and playing with different textures, colors, and shapes will ultimately enhance your final design. Don’t shy away from trying innovative grout colors or incorporating materials beyond ceramics, as blending different mediums can lead to truly stunning outcomes.
Mosaics can be an exciting project for anyone, regardless of skill level, offering ample room for improvement and creative exploration. They can adorn walls, serve as table centerpieces, or add charm to outdoor spaces, reminding us that beauty can emerge from the most unexpected places. As you develop your skills and confidence, consider sharing your creations with others to inspire them to embark on their own colorful mosaic journey.
In conclusion, creating colorful mosaics with recycled ceramics is an enriching way to express individuality, promote sustainability, and enhance your surroundings. Embrace the creative process, learn from each project, and let your imagination take flight. The possibilities are as endless as the array of colors and patterns you can create with your cherished ceramic treasures. Happy crafting!
Related posts:
Creative Stencil Techniques for Decorating Various Surfaces
Mastering Bullet Journals Artful Personal Organization Techniques
How to Make Paper Sculptures Using Only Simple Materials
Transform Old Clothes into Custom Pieces DIY Personalization Tips
Easy Fabric Painting Ideas to Customize Clothes and Home Linens
Start Stop Motion Animation at Home DIY with Everyday Materials

Linda Carter is a writer and creative hobbies expert specializing in crafting, DIY projects, and artistic exploration. With extensive experience helping individuals discover their creative potential and bring their ideas to life, Linda shares her knowledge on our platform. Her goal is to empower readers with practical tips, inspiring ideas, and step-by-step strategies for success in the world of creative hobbies.